
Installing a new head unit or car stereo might seem like a complex task, especially when dealing with missing harnesses or unique setups.
However, with the right guidance and a bit of know-how, it’s a task that you can confidently tackle.
In this guide, we’ll take you through the steps to navigate the intricacies of car stereo wiring, from deciphering those colorful wires to creating custom harnesses, ensuring your audio upgrade is a resounding success.
When you are asking “how to wire a car stereo without a harness” it usually has two meanings.
Wiring a Car Stereo Without Harnesses at All
If your head unit lacks a harness, and someone has removed the harness from your car, you’ll need to combine the following methods to tackle the situation.
The initial step involves acquiring a pinout for your head unit and crafting a brand-new harness. Secondly, you’ll need to identify all the wires within your car’s dashboard, discerning which ones correspond to speakers, power, ground, and other functions.
In a scenario where no factory harness is present in the radio or the car’s dashboard, you’re faced with two viable and budgeted options.
You can either create a new harness for the factory wires, ensuring it plugs into your head unit harness, or opt to solder your head unit harness directly to the factory wires.
Wiring Stereo With No Factory Harness In The Car
Installing a new head unit in your car can be a breeze with head unit harness adapters, allowing for a convenient plug-and-play setup.
However, many installers often resort to cutting the factory harness and soldering in the head unit harness during installation.
The downside? If you ever remove that head unit or plan to upgrade to a new aftermarket one, you’ll find yourself with a web of exposed wires, or worse, having to start from scratch by cutting out the aftermarket harness.
The good news is that tackling this seemingly daunting problem is actually quite manageable.

The key solution lies in obtaining a wiring diagram tailored to your specific car’s make and model from a trusted source or taking a quick trip online to search for a diagram or table that clarifies the roles of each wire.
Then Understand your car’s wiring from that diagram, find them within your dashboard, and connect them to the corresponding wires on your head unit.
Identifying the wires is the first step toward a hassle-free head unit installation and future upgrades. So, let’s delve into the details of the wire identification process.
Wires Identification Process 1:
- Power Cables: These wires are aptly named because they handle the crucial task of transmitting power. They’re the lifeblood that makes your radio and other components come to life.
- Speaker Wires: When you’re setting up an aftermarket radio, you’ll typically find a pair of speaker wires. These wires come in two flavors: negative terminal wires are usually stripped, while positive terminal wires remain unstripped. As for the color code, gray wires usually link up with the right front speaker, while white wires connect to the left front speaker. For the rear speakers, you’ll discover that purple wires are for the right side, and green wires are designated for the left side.
- Brightness Wire: The setup may also feature wires that control the brightness of your radio’s display. Typically, you’ll find two orange wires, one for increasing brightness and the other for decreasing it. It’s worth noting that not all radios include these wires, particularly if you’re working with an older model.
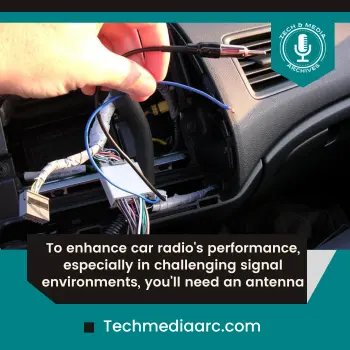
- Antenna Wires: To enhance your car radio’s performance, especially in challenging signal environments, you’ll need an antenna. This antenna must be connected to the radio using a wire. For linking to both AM and FM frequencies, a pure blue wire does the trick. If it’s got stripes, you can put it to use for Bluetooth connectivity.
Understanding these wires makes the process of setting up your car radio without the factory harness of your car smoother, ensuring that you enjoy optimal sound and functionality in your vehicle.
Now that you’ve cracked the color code for all the wires, your next step is to find them within your car’s dashboard and connect them to the corresponding wires on your head unit.
It’s a straightforward process to connect the radio without a car wire harness.
Wires Identification Process 2:
If you can’t locate this information online or prefer a more hands-on approach, identifying the functions of each wire is a simple process.
Armed with some basic tools like a test light, multimeter, and perhaps a 1.5V battery, you can efficiently unravel the wire puzzle in a matter of minutes.
This old-fashioned method is a reliable way to get the job done and have your car audio system up and running smoothly.
Wiring Stereo That Doesn’t Have its Own Harness
When it comes to wiring a car stereo without a head unit harness, you’re facing a more intricate task that might involve a bit of custom work.
So, if your radio doesn’t have the harness then the simplest solution is to find a new or used harness that matches your system. If a new harness isn’t readily available, you might consider hunting for a used one at a local auto salvage yard or used parts shop.
However, if you haven’t found the readymade harness then follow the steps to fabricate for yourself.
Pin-Out Diagram:
To navigate this part of the installation process, you’ll need a pinout diagram for your head unit. The most effective method is to identify your head unit’s model number from the label and then do a quick online search.
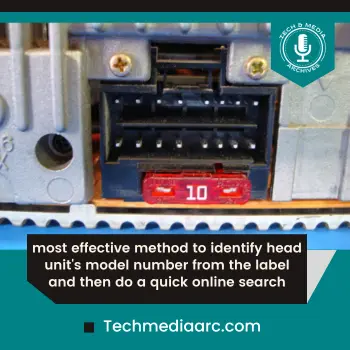
Even if the manufacturer’s documentation falls short, you can often uncover valuable pinout information from forums or other online sources, making your task more manageable.
Customize The Connector As Per The Number Of Pins:
The original connector typically comes with a multitude of pins, around 100 or so. You can find suitable connectors in various catalogs like Digi-key, Allied, or Radio Shack.
The next step is to trim it down to match the number of pinouts your head unit requires.
Be mindful that certain pins may be designated for features like the rearview camera, so you should decide whether to retain them based on your needs.
Once you’ve got the connector fitting just right, you’re all set to start soldering the wires—a crucial step in the process.
Solder Wires With The Connector:
When you’re in the soldering phase, it’s crucial to apply solder to both the wire and the connector. This ensures a more secure and reliable attachment.
Once the soldering is complete, it’s essential to insulate each connection, especially because the pins are closely packed, and any accidental contact could lead to issues.
Solder a wire to every pin as per the pinout, which can admittedly be a bit tedious. Keep in mind that the final result may be somewhat delicate, so it’s important to ensure its stability before plugging it into the rear of your stereo unit.
Hookup Other End With A/V Jacks:
Now, your next step is to locate some female A/V jacks, which can be a bit challenging to find in traditional stores.
One clever solution is to repurpose an old VCR. Carefully open it up and extract these jacks.
To understand their wiring, remember that the outer metal of the jack is the negative, while the inside is the positive.

Solder the leads accordingly, with the outer metal connected to the audio channel ground.
In this setup, the ground is shared between the left and right channels of each front, back, and subwoofer. After soldering, it’s advisable to use a continuity checker to confirm that the connections are sound and functional.
Secure and Test The Connection:
After completing the soldering process, it’s wise to use a glue gun to apply melted plastic over the pin connections.
This added layer of protection ensures that the connections remain intact during the installation, preventing accidental damage.
Perform one last check using a continuity tester. While it’s not possible to test positive connections when the unit is powered off, you can still verify the grounding connections.
To prevent any unwelcome surprises after disassembling your car’s dashboard for installation, ensure that there is continuity between all the negative sides of the A/V jacks and the unit’s ground wire with the harness plugged in.
This step helps guarantee a seamless and trouble-free installation process.
Frequently Asked Questions
How Do I Test My Speakers Before Making My Connection?
To test your speakers before making your connection, you can use a speaker popper or a 9-volt battery. Just make sure to check the polarity with the LED light.
Where can I Find The Wiring Diagram?
Normally these diagrams are provided by the stereo manufacturer in the box. But, if you are unable to find one in your box then you can perform internet research. People must be discussing the specific model on different forums with proper diagrams.
How Do I Find Out How To Remove My Radio?
You can easily learn how to remove your radio by looking for instructions online or in the owner’s manual. The best way is to start with the manufacturer’s website, as they’ll often have detailed instructions on how to remove a particular model of radio from its mount.
If you’re unable to find the steps you need there, then consult your vehicle’s user manual for more information. Once you know what needs to be done, it should be relatively simple to safely and quickly remove your car radio without damaging any other components.
What If My Car Has a Factory Amplifier?
If your vehicle has a factory amplifier, it may require additional tools and knowledge to safely remove the radio. It’s important to consult with a car audio shop before attempting any wiring for your car stereo because having an amp in the system can make it more complicated.
Conclusion:
In the world of car audio, success is often found in the details, particularly when it comes to wiring and harnesses.
We’ve explored the art of understanding wire colors, crafting custom solutions, and the invaluable use of tools like heat shrink wire and continuity testers. By following these steps and tips, you’ve paved the way for a seamless car stereo installation.

Being a radio enthusiast I know that it’s very difficult to get the information available on the internet for radio lovers. Also, sometimes it’s not satisfactory. That’s why I set up a website to share my helpful knowledge and best products with the amazing community of radio lovers.
Leave a Reply